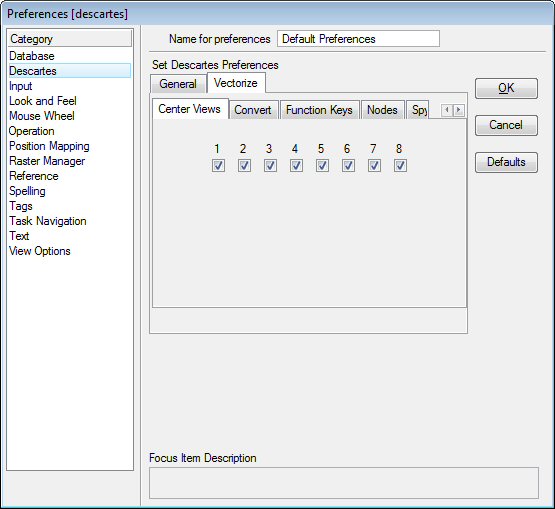
| Center Views |
Used to specify which of the eight MicroStation views are to be centered with the Center on Cursor and Center on Last Point keys.
|
| Circle Recognition |
Use this page to control the validation of the converted circles.
-
Validate Circle Dimension — If on, the resulting vector circle is compared with the raster circle for validation. If the proposed circumference is inside a ring within two times the raster line width, the resulting circle is accepted. If the proposed circumference is outside this raster tolerance, the circle is rejected.
|
| Convert |
Use this page to optimize automatic line conversion.
-
Maximum Line Width — Used to determine what a raster line is. All lines, or parts of lines, or any raster object wider than this value will not be considered as a raster line. There will be no attempt to apply automatic line conversion with the Line mode (as opposed to Outline, which is not affected by this parameter). This value is given in pixels. Use the Measure function which is available with the Cleanup tool in the Touch-uptoolbox to measure the width of the larger lines you want to convert.
-
Line Quality — Used to declare the quality of the lines to be converted. The options are: Many factors can affect the quality of the raster lines on an image, such as the drawing itself before it is scanned, the scanning process, or the color mask you apply. To assess the quality of the lines, display a few samples with a 1:1 resolution. If you see smooth, solid lines, the quality is excellent. Jagged lines have a lesser quality. The more speckles or notches or holes in the lines, the poorer the quality. If there are repeated gaps, the quality is bad. Declaring the appropriate line quality optimizes the efficiency of the automatic line conversion. The better the line quality, the faster the processing, since fewer tests are conducted during conversion.
-
Excellent
-
Good
-
Average
-
Poor
-
Bad
-
Resolution — Used to specify the resolution at which automatic line conversion is performed. There are two options:
-
File — uses the full resolution of the image, which yields better results but takes more time.
-
Display — uses an image resolution similar to the one at which the active image is displayed in the view where you work. If the active image is zoomed out, the process is faster.
Note: When Display is chosen, if you do not see the lines clearly, the automatic line conversion will not work correctly.
|
| Function Keys |
Use Function Keys to assign a function key (F1, F2, F3, etc.) to a function working with the Vectorize toolbox.
A list box displays a two-column table showing which function is assigned to each of the Function keys.
An option menu allows you to choose a function to be assigned to the selected Function keys. The options are:
|
| Generalization |
Used to set the Use Stream Parameters toggle.
-
Use Stream Parameters — If on, the four MicroStation stream parameters will be used to perform generalization of all vector data generated with any Vectorize function. If off, only vector data generated with the Stream mode will still use these parameters. Vector data generated by all other means will be generalized without requiring parameter settings. The MicroStation stream parameters are Delta, Tolerance, Angle, and Area. For a full description of these parameters, see the MicroStation Reference Guide.
-
Straighten Lines Tolerance — If Straighten Lines is selected in the Vectorize function window, the tolerance parameter specified here will be used to perform generalization and a 2 points line will be generalized for each straight segment.
|
| Nodes |
Used to set the parameters controlling the display or the automatic placement of nodes.
-
Auto Snap Vector — The Auto Snap Vector option menu controls the automatic vector snap mechanism. Three options are supported:Conditions are explained in the section on Vector Behavior. Default is None.
-
Choose None to turn off this mechanism.
-
If you choose Insert, a Snap/Insert Vector occurs automatically where and when automatic line conversion finishes.
-
If you choose Break, a Snap/Break Vector occurs automatically where and when automatic line conversion finishes.
-
Auto Place Nodes — Turning Auto Place Nodes on (default) activates a mechanism with the following effects:
-
All used break points automatically transform into nodes.
-
Nodes will be automatically placed on all ends of generated vector lines.
-
Nodes will be automatically placed at critical points.
-
Display Nodes and Color — If Display Nodes is on, nodes display with the color chosen with the color picker. Default is on and red. The size of a node varies with the situation:
-
If it is placed on a line with a raster snap, it is a little larger than the line.
-
If it is placed where there is no line, or with no raster snap, or with an outline snap, it is the size of the locate tolerance set in MicroStation.
|
| Spy Window |
Use the Spy Window category to set all parameters that control the spy window.
The spy window is like a magnifying glass displaying in the view in which it is enabled. It is opened or closed with the Spy Window function key.
-
Zoom Ratio — Used to specify the zoom factor of the spy window.
-
Deactivate on First Data Point — If this toggle is on, the Spy Window is turned off when you enter a first data point.
|
| Text |
Use this page to specify parameters for Text Recognition and Selection.
-
Center on Current Text Selection — If this toggle is on, the view is automatically recentered on the current text selection. If off, the selection will be recentered only if it is located outside the view. Default position is On.
-
Text Quality — Used to declare the quality of the text to be converted. The options are: Many factors can affect the quality of the raster text on an image, such as the drawing itself before it is scanned, the scanning process, or the color mask you apply.To assess the quality of the text, display a few samples with a 1:1 resolution. If you see smooth, solid lines forming the text, the quality is excellent. Jagged lines have a lesser quality. The more speckles or notches or holes in the lines, the poorer the quality.Declaring the appropriate line quality optimizes the efficiency of the automatic text conversion. The better the line quality, the faster the processing, since fewer tests are conducted during conversion.
-
Language — Used to specify the character sets that will be recognized. Choose from Danish, Dutch, English, Finnish, French, German, Italian, Norwegian, Portuguese or Spanish.
-
Use Dictionary — This toggle sets On/Off the automatic text correction using the specified language.
-
Custom Dictionary — Allows to use a custom dictionary. Click the Select button and browse to specify the dictionary you wish to use.
-
Horizontal Spacing Factor — Used to control the horizontal distance between words during text selection. Options are: Low, Medium and High. Declaring the appropriate spacing factor optimizes the efficiency of the automatic text selection.
-
Variance of Character Height — Used to control the vertical tolerance factor during text selection. Options are: Low, Medium and High.Declaring the appropriate variance factor optimizes the efficiency of the automatic text selection.
|
| Warnings |
Use this page to control whether warnings will be displayed.
-
Display Auto Convert VS Automatic Vector Stamping Warning Message — If Automatic Vector Stamping is on (See Automatic Vector Stamping) and automatic line conversion is going to take place, a warning displays. The warning box allows you to stop receiving the same message again with the Do not display this message again toggle. When you turn on this toggle, it can be turned off again by using the Display Automatic Vector Stamping Vs Auto Convert Warning toggle, which is synchronized with the above.
-
Display Erase Raster VS Automatic Vector Stamping Warning Message — If Automatic Vector Stamping is on (See Automatic Vector Stamping) and a vectorizing tool with Erase Raster set to on is selected, a warning displays. The warning box allows you to stop receiving the same message again with the Do not display this message again toggle. When you turn on this toggle, it can be turned off again by using the Display Erase Raster VS Automatic Vector Stamping Warning Message toggle, which is synchronized with the above.
|